Making Trash Useful: A Hanging Light Made from Old Bike Rims
When you're surrounded by bikes as much as I am, parts start to pile up—bent rims, old forks, and rusted frames that are just waiting to be moved to the curb. I’ve had a problem with the lighting in the shop since I moved it from the garage into the house. I wanted something that fit the theme of recycled bike parts that would help keep me from straining my eyes so much. This was a good way to give a few old rims new life.
From Trail to Ceiling
The idea was simple: take a couple of old bike rims, clean them up, and use them as the skeleton for my glorious chandelier. All that was required was to attach rope light to some old bike rims.
Building the Fixture
Here’s how it came together:
Materials:
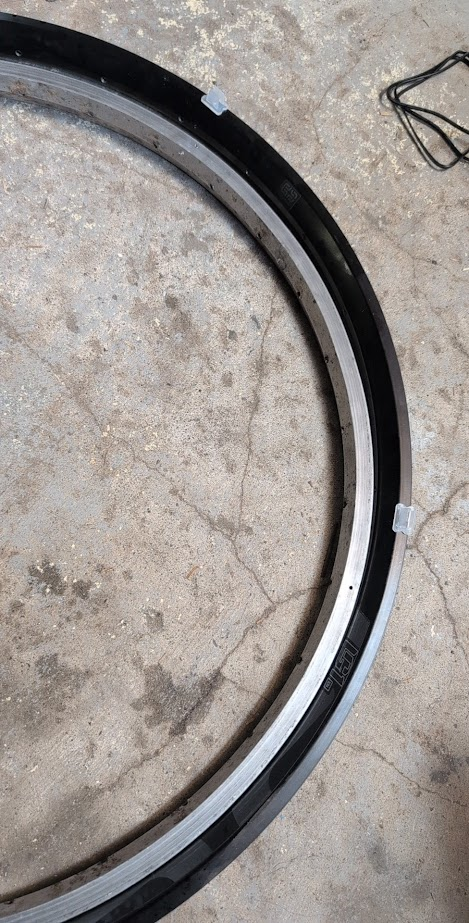
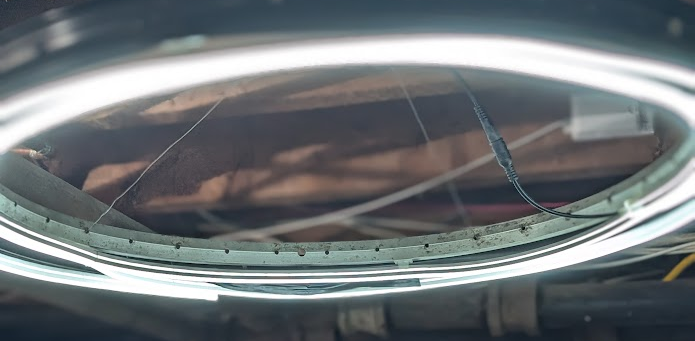
- 2 old bike rims, 1x 26” and 1x 29” (no tires, no tubes—just the rims.)
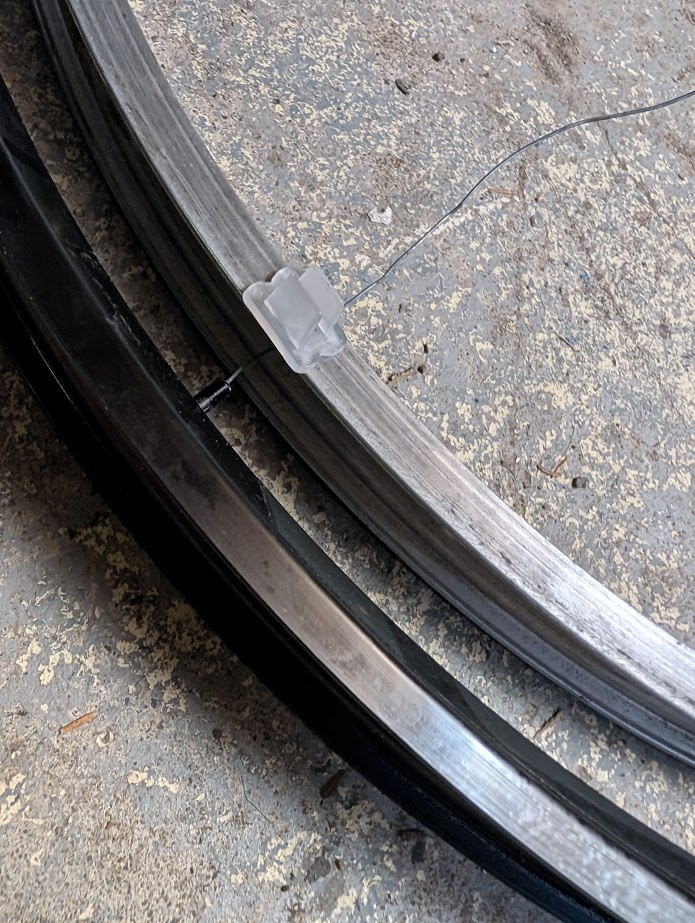
- Spoke nipples—they are perfect for holding rims to things.
- A cheap rope light from your favourite retailer of lights.
- Steel cable for suspension.
Process:
- Prep the Rims – The rope light came with plastic mounts and small screws. I decided the easiest way to align the light would be to drill the rims so the light could be oriented and fixed to the rim easily. Five holes spaced evenly around two rims, since the rope came with ten plastic mounts.
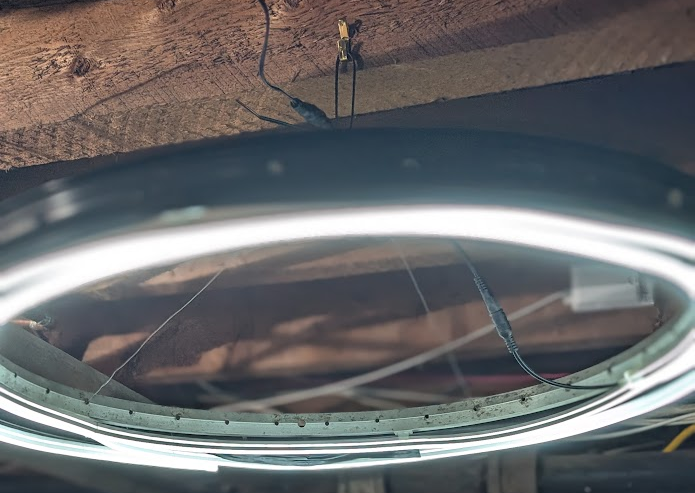
- Suspension – Steel cable attaches at four points on the top rim, all meeting at a central hook to keep it balanced overhead.
- Light Kit Install – Once the plastic tabs were spaced out, I just ran the rope light around and around, taping areas that needed extra support.
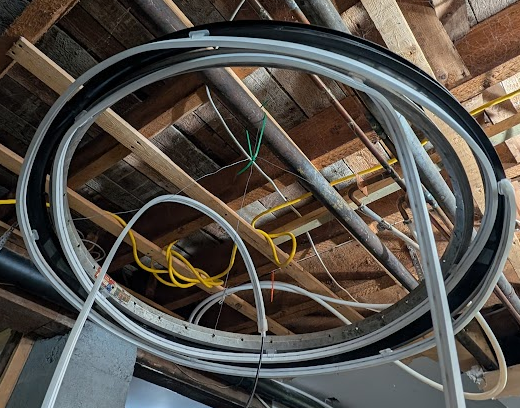
- Stack & Space – Using steel wire, I connected the two rims together with the smaller rim inside. I didn’t want to have to trim the rope light as it would reduce the total light output.
-
Prep the Rims – The rope light came with plastic mounts and small screws. I decided the easiest way to align the light would be to drill the rims so the light could be oriented and fixed to the rim easily. Five holes spaced evenly around two rims, since the rope came with ten plastic mounts.
-
Stack & Space – Using steel wire, I connected the two rims together with the smaller rim inside. I didn’t want to have to trim the rope light as it would reduce the total light output.
-
Light Kit Install – Once the plastic tabs were spaced out, I just ran the rope light around and around, taping areas that needed extra support.
-
Suspension – Steel cable attaches at four points on the top rim, all meeting at a central hook to keep it balanced overhead.
The Result
The whole build took maybe an hour. Now it hangs above my bike stand, casting a warm, soft light while showing off some trail-earned battle scars from its past life. It’s a functional conversation piece, and a reminder that even parts destined for the bin can still be made useful again.
Why It Matters
There’s something special about reusing old parts instead of tossing them. Not just for sustainability (though that's a bonus), but because these bits and pieces carry stories. Every scratch, dent, and ding has a memory behind it—from first races, to sketchy descents and long summer evenings on the trail.
This light fixture isn’t just practical—it’s a tribute to the miles those rims carried me, and a little reminder that creativity doesn't always start with new materials. Sometimes, it starts with what’s already hanging around.
Have you built anything cool out of old bike parts? Let us know—we’d love to feature your project or even collaborate on a future DIY!
